


How to Photograph Jupiter
Capturing Jupiter's vibrant bands, massive Red Spot, and its four bright moons is an exciting process when done with the proper equipment and steps.
Jupiter is a great start into planetary imaging because it is our Solar System's largest planet and the brightest to see from Earth.Planetary imaging is a rewarding process that may lead you to many more astronomy experiences.
Follow this step-by-step guide on How To Image Jupiter and you will be well on your way to becoming an expert!
WHEN SHOULD I IMAGE JUPITER?
An important factor to consider when shooting Jupiter is its location in the sky. When it has just come up over the horizon, you will be observing it through a lot more of Earth's atmosphere than if it were up higher in the sky.
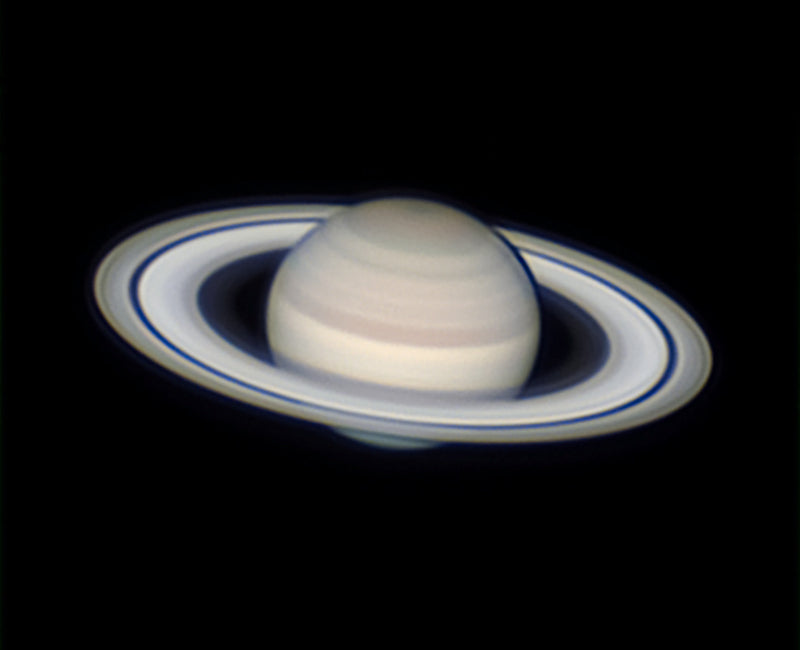
Pro Tip: Don't try to image Jupiter just after it has cleared the horizon, as it will result in blurry images. Being able to image through as little of the atmosphere as possible and on good stable days will greatly improve the quality of the videos, which in turn will lead to better images (see below for comparison).


The image on the left shows Jupiter after it has just cleared the horizon. The image on the right shows Jupiter when it has reached at least a 45-degree angle in the sky.
WHAT EQUIPMENT DO I NEED TO PHOTOGRAPH JUPITER?
There are so many options to successfully capture Jupiter. We've compiled a list for your success. Read on to learn more!
WHAT MOUNT DO I NEED?
Ideally, a German Equatorial Mount should be used so that Jupiter remains centered during the exposure, however, you could still effectively use an Alt-Azimuth Mount with tracking abilities.
WHAT CAMERA AND TELESCOPE DO I NEED?
The first thing you will need to photograph Jupiter effectively is a telescope with a relatively long focal length. The longer the focal length, the greater the magnification, resulting in a larger image on the camera's sensor.
Secondly, a good CCD Camera or CMOS Camera is crucial for high-resolution planetary imaging.
In order to achieve the best results for your images, you will need to ensure that your equipment is working in sync.The following formula is a great guide to follow when pairing a telescope and planetary camera for imaging:
The optimal focal ratio of your telescope = 5 x Camera's Pixel Size (in microns)
For example: If your camera’s pixel size is 3 microns then you should try for 5 x 3 or f/15.
Pro Tip: Using the right camera is a crucial factor in producing a good image of Jupiter and you want to ensure that it is comprised of all the important properties needed for good images. CCD and CMOS Cameras offer high frame rates with no compression, and using the fastest frame rate possible will effectively yield desirable results.
HOW TO PHOTOGRAPH JUPITER?
- By connecting your camera to a laptop,your target will display on the laptop, and you can use a special image-acquisition software on the laptop to shoot videos of your target.
- Once you've set up your scope, connected the camera, and pointed at Jupiter you will now want to ensure that your focus is as accurate as possible. In order to avoid poor focus and the frustration of a blurry image, we recommend a dual-speed focuser.
- Now that you've gotten through the rather more frustrating part, it's time to start shooting some video. Video is ideal to capture a lot of detail and offers hundreds of frames per second, which you can then stack in a stacking program during post-processing. This method will produce a nicely detailed composite of your video frames and can be further edited in your preferred image-editing program.
Learn more about astrophotography setups and click here to see our guide! Clear skies!